Tuesday 22 December 2015

Christmas Decorations from a Stitcher's Perspective

This year, as in many other years, I have been busy making things in the run up to Christmas. Things that are far from essential but for some reason I feel I have to make before the 'big day' and here are two of the things I have been making.

This is my Christmas mannequin which was inspired by one I saw in John Lewis. I had every intention of making a simple red top to go on it but with no red fabric and little time I had to resort to something I already had and the beaded top fit the bill, after all when did I last wear it? I enjoyed decorating her and I think she could become  an annual fixture at Christmas.
And sticking with the sewing theme, here is this year's stitcher's wreath. I've used pretty much all my bright shiny threads in the wreath and I'm hoping they will remain intact and usable when it comes down in January. It may have benefited from additional reels, maybe next year I'll either paint some of the wooden reels in bright sparkly colours or perhaps wrap them with bright ribbon or fabric and use more of them. Next year? Now I'm getting ahead of myself!


I'm also trying to finish making a dress to wear over Christmas! This will be my first attempt at making a lined dress and although the main part of the dress is almost complete, I've yet to buy the lining! I'm not sure if I had a brain storm when I bought the fabric or whether they gave me too much but there was a lot left over and so I  cut out a funky top that I have been wanting to try for some time and am sewing that too. Madness! Obviously I'm sewing these without my dressmakers dummy - she's otherwise engaged. 

But before I go back to my sewing, I would like to wish you all a very merry Christmas and a happy, healthy and creative new year. 

Wednesday 16 December 2015

Printing with my 'Torn Paper' Thermofax

The two pieces of fabric I printed with my torn paper thermofax are now ready for stitching.  The photographs do not show them at their best, partly because it was a dismal day when I took the photos and partly because they are light in colour making it quite difficult to capture the detail. 

I printed two pieces and for both I cut the fabric in two, lightened the sky and roughly pinned some darker fabric along the horizon line. I have started to add some tacking stitches to mark the stitching areas in the piece below:

Although the overall effect is light, it is made up of layers of colours, which I hope adds interest to the piece.

I used some brighter colours in my second piece, as I knew I would overprint with white fabric paint, mimicking the processes I used on the paper and trying to link back to the whiteness of the salt flats.
This is a close up of the piece and hopefully you can see where I've added texture and the brighter colours underneath the white over printing.
I'm really looking forward to stitching into these as it seems ages since I've done any and hopefully I'll find some time over the Christmas break. I've had some valuable feedback on these pieces which in my heart I think I knew but tried to ignore so I could move onto the stitching phase and that was that these pieces of fabric don't begin to show the scale of the landscape I'm trying to convey. I think this is partly down to me working on a smaller scale in my kitchen but now I'm going to plan my next piece better and not let the space dictate the cloth to me and that will probably mean wearing several fleeces and working in the garage. Brrr..I'm just going to have to treat these as two very large samples!

Sunday 29 November 2015

From paper to digital printing back to printing with dyes

Again, it's been a while since I last posted. I have been progressing some ideas but have been doing a lot of thinking about my work and that of others. I have bought a number of books, been inspired by some and struggled to stay awake reading some of the 'art speak' in others but the time has come (passed?) to just get on and do it.

I have been progressing some of the Van Gogh inspired ideas I posted about here.  I particularly liked the effect created by tearing and layering torn paper and so used the technique to create background texture which could be used  as the basis  for one or more of my salt flat pieces.  


Printing, tearing and layering the papers takes time but I was pleased with the results and so decided to get it digitally printed onto fabric in different sizes so that I could use for a number of samples and also to get previous collages printed onto fabric. I had my images printed by Bags of Love who seem to print everything it's possible to print. It's difficult to see from the photograph but on fabric they looked a dull bluey grey and not the light creams, beiges and browns of my paper collage.

As digital printing wasn't giving me the effect I wanted, I decided to go back to printing with my dyes and to create my own thermofax based on torn pieces of paper. 


To add additional texture and salty crustiness to the pieces I also created this spotty thermofax screen....

And so the printing began. I am quite pleased with the fabrics I have created so far and will show you then in my next post as they are still wet at the moment (I promise the gap between my posts won't be quite so long next time).

But just before I go, I wondered if any of you saw this on the BBC web site: Art and Fear? I had read this story before but it was a timely reminder to me to 'just get on with it'. It's interesting, do have a look.

Wednesday 9 September 2015

Dressmaking and skirt making

I've been sewing...sewing practical things! It's very rare for me to wear patterned skirts but when I saw this button fabric it was the incentive I needed to make the wrap skirt I'd been meaning to make for ages.  This is the pattern I used.

I made a couple of alterations, not least adding 19 cm to the length! Who would know from the pattern that it was a mini skirt? The other alteration I made was to move both ties to the left hand side of the skirt rather wrapping it around the back and I think this makes it look a lot tidier.

The skirt was easy to make and easy to wear, so I  bought some more fabric and made another one only this time I adjusted the pattern so that the skirt sat on the waist rather than below it as the pattern intended. 


I thought the higher waist would be more flattering but it doesn't seem to have made a lot of difference.
Buttons, needles and threads... it's obvious why I might be attracted to these patterns but snails? I think this pattern was probably intended for children but I made it up into a dress using this pattern
This is an easy pattern but couldn't help making a few changes to  this too. Firstly, I stitched up the opening at the back as I could get it on over my head without it and inspired by the lovely sleeveless tops Gill made, I added some home made bias binding to the neck and sleeve edges. This was my first attempt at making my own bias binding and although it took longer to do I think it was worth the extra effort.

Besides 2 new skirts and a new dress, I have also gained a new sewing machine and I'm thrilled with it!  I bought it from the charity Workaid when I was at Missenden Abbey.


I've wanted one of these machines for ages because....well because I the look of them but it never seemed quite the thing to buy online.  So now I have one and I have supported a well good cause too.
Does it work? It certainly does but I don't think I'll be using it to make my next skirt, I think I'll just sit and admire it.


Sunday 23 August 2015

Gaining inspiration from Van Gogh

Last month I went on Janet Edmonds' 3 day summer school where we looked to Van Gogh for our inspiration. For most people the course involved design work and some stitching but I was more than happy  just working through my design ideas without doing any stitching.

We started by making print blocks inspired by the textures in Van Gogh paintings and used them to take rubbings and to print with and created enough papers for all eventualities! Well once you're on a roll and you're enjoying yourself why not?

I used the Chilean salt flats as my inspiration and this is probably my favourite piece. The detail is not clear in the photograph but I like the textures in the sky and wouldn't have created this if I hadn't been looking at Van Gogh's work. I must confess that this included some papers that I had created previously, albeit with the salt flats in mind.


I was thinking of his broad brush strokes when I ripped up these papers in the foreground but by the time I coloured them them they started to take on a rock-like quality.


Looking at Van Gogh also made me be bolder with my colour choices and made me move away from the more obvious colours that I would otherwise have used but I'm sure I could be a lot bolder still.

The piece below is the first one I created and I think you can see more clearly the textures in the sky and I started to introduce more 'unusual' colours like you see in the purple bands.


With a little nudge from Janet, I started to use ripped up papers to imitate his broad brush strokes and I liked the effect it created.


Again, I used colours that I wouldn't naturally use and I tried to include some complementary colours too.


Now the observant amongst you will have noticed that the top section of the above image is identical to the top section of the image below, and I have created two options for the foreground. which was created with texture paste and then painted and rubbed to add colour and to highlight the textures.


So what next? Well I have another Idea that I would like to progress and I had hoped I would have that to show you too but they seem to be making Sunday's shorter these days and tomorrow I'm back to work. Ultimately I am to get my images printed on fabric and then to stitch into them.  I'll let you know how I get on and I hope it works because one thing's for sure, this approach is a lot less messy than dyeing fabric.

Janet had a new book out in September From Art to Stitch and I'm looking forward to seeing which other artists I can look to, to help me step outside my comfort zone.


Saturday 25 July 2015

Fractured Landscape

Finally, my Fractured Landscape piece is finished! I may have spent more time on this piece than any other but that doesn't make it my favourite. I have spent so much time on it that I just had to finish it or all the time spent would have seemed like such a waste.


Another driver for me to complete this piece was that quite some time ago I entered it into the Quilter's Guild competition which will be held at the Festival of Quilts in August. The theme for this year's competition is 'Passion in Pieces' and I have incorporated two of my passions into this piece; my passion for landscapes, which is in pieces (!) and also my passion for stitching which is represented by the text I have layered and layered and reads  'I cannot count my day complete till fabric thread and needle meet'.


I used the text as a way of creating colour and texture and a way of referencing another of my passions and I knew the words would never be legible but you can see some of the letters if you look closely. Although this was a very time consuming method of colouring cloth, there are parts of the fabric that I really like which I probably couldn't have created by any other (quicker) method.


This is also the first time I have left raw edges in a piece and this is something that I would normally shy away from but I think it did emphasise the landscape 'in pieces'. 


And of course I couldn't finish the piece without the addition of some hand stitching. There was more hand stitching on the work earlier in the week but some of it got lost when I cut 2 1/2 inches off the top. Drastic? Yes. Last minute? Yes! The deadline for delivery was yesterday, which I met - just.. And although it was a shame to lose the stitching, I feel the piece looks better for it. 

Lesson learnt from this piece: Pay more attention to proportions, just because a piece of fabric is a certain size, it doesn't mean you have to use it all.

Sunday 5 July 2015

Smart Textiles

I really like the idea of being able to incorporate technology into textiles and although it is interesting to use it in a practical way, I'm more interested in, or maybe intrigued by, how it could be used in textile art, so I booked on the Smart Textile course at the V&A which was run by Sara Robertson

One of the things we did was to stitch a circuit using conductive thread which lit up small LEDs which came on and off at different intervals.


We also did printing will thermochromic paint which changes colour when heated and experimented with paints that changed colour at different temperatures and sometimes mixing them with standard acrylic paints.


In this piece I mixed the thermochromic paint with standard acrylic paint and printed with one of my old gridy thermofax screens.The heat of my hand 'removed' the thermochromatic paint revealing the yellow acrylic paint that it had been mixed with.


This was printed with liquid crystal and it was fabulous but expensive. It is hard to capture the colour changes in a photograph but you can see on the right hand edge that there is little colour but some beautiful colours have been revealed where the heat of the hand has been placed. It has been so hot this week that this fabric has been constantly colourful and what's interesting is that different colours are revealed over time. How does it do that?


The garment above was created by See the Unseen using similar paint and I love it! They're based in Somerset House and they're definitely on my list to visit. 

So the really clever thing would be combine the circuits and thermochromic paints together and this was my first attempt. I stitched a line of conductive thread and added power so that it heated up the fabric around the thread and changed the colour of  the paint.


Not exactly a work of art but it starts to show the potential of the technology. 


Whilst I was on the course the V&A design bus arrived and our tutor Sara, had an exhibit displayed. I was very glad it hadn't been me that had to park the bus between two lampposts on a busy London street!


All the exhibits used technology in innovative ways and we were treated to an informative pack about the exhibits and the artists.  


They do things well at the V&A don't they? I really enjoyed the course and it has sown (sewn?) some creative seeds but I think I'm along way off being able to use it in my work. 


Monday 15 June 2015

I'm back...and Dangerous and Vulnerable is finished!

I knew it had been some time since I last blogged but I had no idea it had been as long as it actually has. It's only down to one thing....or lack of one thing...time. Deadlines at home and work and life have conspired to keep me particularly short of time recently but hopefully I will get back to posting more regularly again. Whilst I've been away. I've finished my 'Dangerous, vulnerable' piece.


The steam coming from the geyser is heavily stitched with machine embroidery and I went from trying to knock the lettering back to trying to bring it back out when I'd knocked it back too much. I wanted the lettering to be visible but not 'in your face' and hopefully I've achieved that.


I stitched layers of colours to get the effect I wanted, a technique I don't remember doing before. In fact I don't often do machine embroidery but I was pretty pleased with the way it turned out and the fabric remaining nice and flat, which was pleasing.


I also machined quilted over the geyser, using the geyser shapes as a guide but I couldn't call the quilt finished without adding some hand stitching and I used some silvery thread to emphasise where the light was catching the geyser.


There was one key lesson I learnt during the stitching process though...always choose the colour of your thread in daylight. It does save a lot of time unpicking later!

If you're wondering why I incorporated the lettering into the piece then this is the artist statement I have written to accompany the piece: 'The boiling water from the geyser gives off unpredictable clouds of steam, reminding me that just as the earth is vulnerable to our selfish actions, so we are vulnerable to it’s dangerous forces.'

I've entered the quilt into this year's Festival of Quilts at the NEC, so if you're going to the NEC look out for it in the Art Quilt category.

Wednesday 22 April 2015

Dangerous and Vulnerable

I seem to have a number of  textiley things on the go and not as much time as I'd like to progress them. At the moment I'm trying to concentrate my efforts on this piece, which is based on a photograph I took of a geyser in Chile. 

I've had the image printed on fabric by Fingerprint and it's roughly 140  x 75 cm. Seeing the boiling water bubbling from the geysers made me think of how the earth is both dangerous and vulnerable. I wanted the words 'dangerous and vulnerable' to emerge from the steam and I played around with different lettering.


I wrote with liquid dye on paper and planned to add the lettering digitally to the photograph. I really liked the colour variations in the lettering but I didn't really like the way it looked on the image. In the end I created the letters in Word which I then placed along the horizon line. 

The fabric was larger than the image size and so was pleased that they filled the fabric with images I could use for sampling. 


The lettering came out stronger than I planned but my machine stitching is gradually knocking it back.

I wasn't sure how clearly the image of the geyser would print and had expected to over print on the fabric but it has printed so clearly that I can't see how over printing would enhance it. 

So my original plan's have been turned on their head but then I should be used to this....very rarely does my printing turn out exactly to plan. Do I enjoy printing because it's unpredictable or despite it? I think despite it!


Monday 23 March 2015

Embroidered Bag ...first of many?

On Saturday, I spent an enjoyable day at the North Herts and Beds Embroiderers' Guild on a bag making workshop, which was tutored by Alex Waylett . A girl can never have too many bags, I say. 

We each chose a piece of patterned fabric for the front of our bag and embellished it with machine embroidery and added a few beads and sequins for good measure. 


It's not often that I get an 'action shot' but this one was taken by my friend Jill came who came with me as a guest.  Jill is very creative but had never done any machine embroidery before but she made this lovely bag and is planning on making more. It's a shame that she doesn't live nearer or I'd be getting her more involved in all things embroidery related, until her conversion was complete : )

I could happily have spent a lot longer embellishing my fabric before I made it up my bag but quite rightly, Alex made sure we all left enough time to learn how to make up the bag before going home...and we all had a lovely finished bag to home with. 


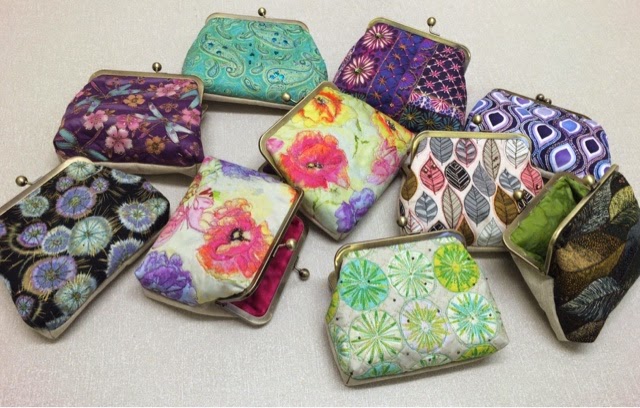
It would be nice to embellish some of my growing pile of hand dyed and printed fabrics and to make them into bag. I bought a spare bag frame so what am I waiting for? If you would like to make a similar bag, Alex has a number of workshops scheduled this year at different venues, including some at Art Van Go

Sunday 15 March 2015

Still writing with dye.....


Fortunately, I'm working on a piece that is made up of five separate pieces, which means that I can avoid working in the cold garage on a large table and can work on each piece individually in the kitchen. In the garage I balance a large piece of board between two trestle legs but in the kitchen I have used a smaller piece of board balanced between one of the trestle legs and the work top. It slopes down a little but I'm quite pleased with how the set up works and I can work for longer because I'm warmer. I'm layering colour by writing text, in layers on the fabric until I get the colours that I want. Partly due to the fact that I am printing on a thick linen and partly because I'm adding colour cautiously, it's taking some time and so being able to keep warm is important.

I've got plans to create a stitched sample for a completely unrelated piece and seeking inspiration I had Jan Beaney and Jean Littlejohn's 'In stitches' DVD running on my laptop whilst I was printing. How's that for multi-tasking?

This is the fabric after it was washed. I'm trying to create the type of colour variation that you would see in vegetation on the horizon and this is starting to build but is still some way off, albeit that it isn't quite as washed out as it appears in the photograph. Much more layering of text to do....